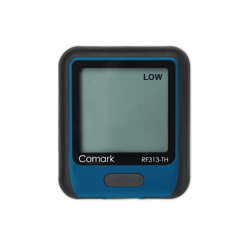
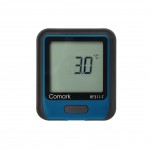
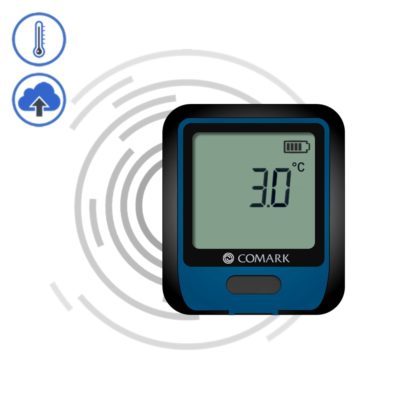
WiFi Temperature and Humidity Data Logger
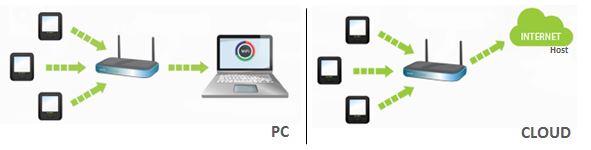
Part No: RF313-TH (4365216)The RF313-TH Diligence WiFi Temperature and Humidity Data Logger measures the temperature and humidity of the local environment with its integral sensor. Data is transmitted wirelessly via your WiFi network to the Comark Cloud.
- Temperature range: -4°F to +140°F / -20°C to +60°C
- Simple installation using existing WiFi network
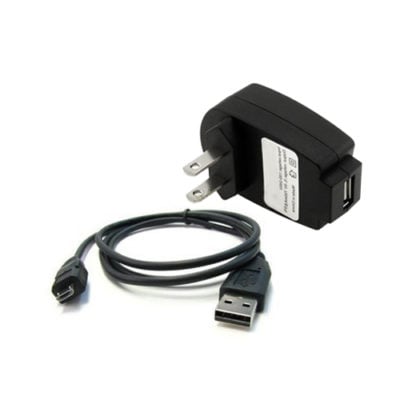
- Supplied with wall bracket and micro USB lead
- Comark Cloud charges apply
- Warranty: 1 year
SUITABLE FOR VARIOUS APPLICATIONS


FEATURES
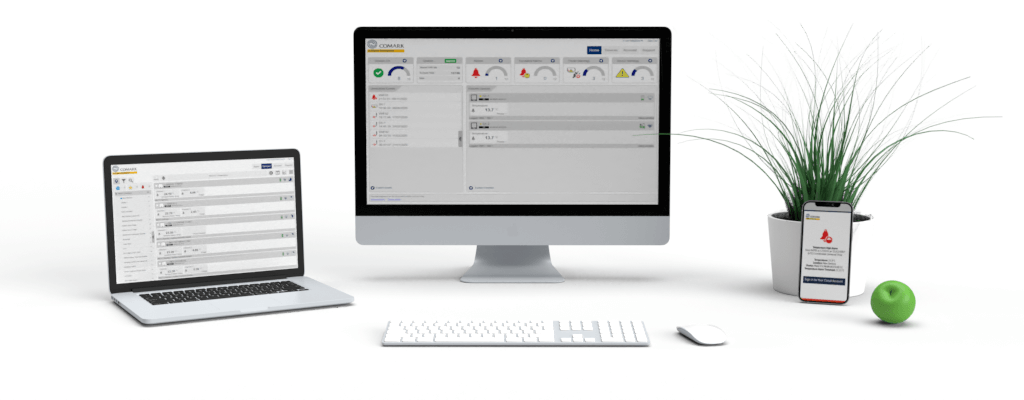
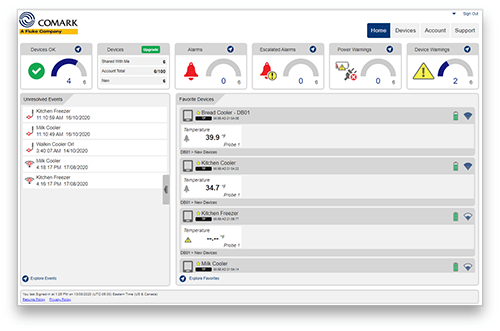
COMARK CLOUD
Technical Specifications
| Name | Value |
|---|---|
| Battery life | Typically *3-6 Months |
| USB supply voltage | 5V (typical) |
| Temperature measurement range | -20°C to +60°C / -4°F to +140°F |
| Humidity measurement range | 0%RH to 100%RH |
| Temperature internal resolution | ±0.1°C / ±0.18°F |
| Humidity internal resolution | 1.0%RH |
| Temperature accuracy (overall error between +5°C and +60°C) | ±0.5°C |
| Temperature accuracy (overall error over the full °C range) | ±1.5°C |
| Temperature accuracy (overall error between +41 to +140°F) | +/-0.9°F |
| Temperature accuracy (overall error over the full °F range) | +/-2.7°F |
| Humidity accuracy (overall error between 0%RH and 100%RH) | ±5.0%RH |
| Logging rate (user configurable) | Transmisson rate from every 10 seconds to every 12 hours |
| Transmission period (user configurable) | 1 minute to 12 hours |
| Operating temperature range | -20°C to +60°C / -4°F to +140°F |
| Logger dimensions | Height 97.3mm / 4" x Width 71.3mm / 3" x Depth 26.36mm / 1" |
| WiFi Compliance | IEEE 802.11b/g/n compliant, supports WEP, WPA/WPA2 encryption and enterprise networks (MS-CHAPv2, PEAP, EAP-FAST, EAP-TTLS) |
| Warranty | 1 Year |
*You will need to Sign In to view additional content
Documentation
Downloads
Articles / FAQs
| Name | Date |
|---|---|
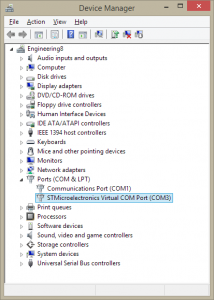
Help with Troubleshooting Common IssuesHelp with Troubleshooting Common IssuesThis knowledge base article is a step-by-step problem solver, addressing some of the most commonly encountered problems and issues when setting up and using the RF300 Diligence WiFi Devices. WiFi Device will not connect to the PC via USBYou have the RF300 Diligence Sensor Software downloaded and installed on your PC. You’ve run the software and connected the WiFi Device to the PC using the USB cable provided but the software does not recognise connection of the Device.
If the above has not resolved the problem please try the options below..
If the above has not resolved the problem please try the options below….
Connecting to wireless networksMy wireless network does not appear in the list during setup
If you have tried all of the above but the wireless network still does not appear in the list, please contact your IT Administrator or supplier
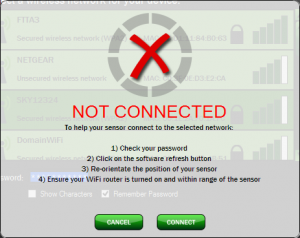
My wireless network appears in the list but the WiFi Device fails to connect
If the above has not resolved the problem please try the advanced options below
Failure to complete the setup processMy WiFi Device fails to save settings when setting up on the PC
My WiFi Device fails to save settings when setting up on the Cloud
Cloud Sign-In problems using the PC SoftwareI cannot Sign-In to my Cloud Account from the PC software.
If you are unable to sign in to your Cloud Account through the PC software please check that:
Loss of ConnectionMy WiFi Device loses connection to the PC or the Cloud. Generic (applies to both Cloud and PC connected WiFi Devices)
Cloud
PC Software
Resource limitations on the PC running the WiFi Sensor Software may cause the processing of messages from the WiFi Devices to take an excessive amount of time. This may cause the WiFi Devices to lose connection. Try closing some programs or restarting your PC. Some Firewall and Anti-Virus/Security software may also cause issues here. Miscellaneous ItemsIf you are using the PC software and the ‘Next’ button is missing on the Alarms page, ensure your font scaling is set to 100%. If the software doesn’t run on XP, Vista, or Windows 8 you may need to install .NET 3.5 SP1 framework.
| 7th December 2016 |
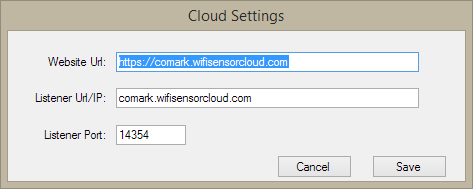
Help checking my comark.wifisensorcloud.com Server SettingsHelp checking my comark.wifisensorcloud.com Server SettingsThis knowledge base article shows how to check or change the Comark Cloud server settings in the Comark Diligence WiFi Software. To check your Comark Cloud Server settings
If when pressing Ctrl+Alt+S you get a Support Information Window on your HP or Compaq PC, see the section below. HP and Compaq desktop computers are designed to display System Information when pressing Ctrl+Alt+S keys simultaneously. However, this key combination is needed by the WiFi Sensor Software, in order to display the Cloud Server Settings window. To change or disable the key combination associated with the HP or Compaq System Information window click Start , All Programs , “HP Help and Tools“ For Compaq computers, right-click either Compaq Support Information or Compaq Presario Support Information, and click Properties For Pavilion computers, right-click either HP Support Information or HP Pavilion Support Information, and click Properties Click inside the Shortcut Keys field, and either delete the contents of the Shortcut Keys (None) or change it to another key combination that you are not using in other software programs. For example, if you want to change the key combination to Ctrl+Alt+Z, select the Shortcut Key field and press all three keys at the same time.
You can download a copy of this information by clicking here.
Comark operates a number of Cloud servers to accommodate the needs of our customers. In almost all cases the default Cloud settings will be correct for your application. These settings are persistent and will be remembered when you close the software, or install a software upgrade.
| 27th March 2015 |
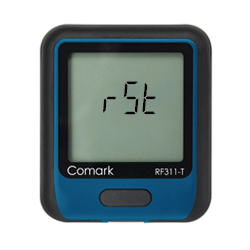
Help with Restart or Factory ResetHelp with Restart or Factory ResetThis knowledge base article refers to the RF300 Diligence WiFi Data Loggers, including the RF324 Alarm Unit. How do I Restart or Reset my RF300 Diligence WiFi device?Under normal circumstances, you do not need to reset your RF300 Diligence WiFi Device. However you may be instructed to do this by our support team to recover a Device which is not working properly, or return it to its factory state. RestartPerforming a Restart on the WiFi Sensor will restart the internal firmware, retaining all configuration and network settings. The Sensor will disconnect from the wireless network, and immediately enter a low power sleep mode. It can take up to 30 minutes for the Sensor to re-connect and synchronize after a Restart. Under normal circumstances the Sensor will synchronize within 15 minutes. Once communication is re-established the Sensor returns to its normal transmission rate. A Restart will cause a new recording session to be started. To perform a Restart on an RF313-TH Data Logger
To perform a Restart on all other RF31x Data Loggers (RF311-T, RF313-TP, RF314-TC)
To perform a Restart on the RF324 Alarm
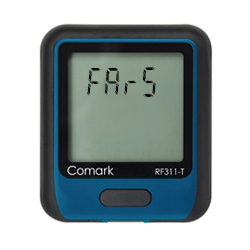
Factory ResetPerforming a Factory Reset on the WiFi Sensor will clear all internal configuration and network settings. The Sensor will disconnect from the wireless network, and all WiFi activity is stopped. When you want to use your Sensor again, you’ll need to connect the Sensor to a wireless network and re-configure it using the WiFi Sensor Software. You should perform a Factory Reset prior to shipping the Sensor or before storage. To perform a Factory Reset on an RF313-TH Data Logger
To perform a Factory Reset on all other RF31x Data Loggers (RF311-T, RF313-TP, RF314-TC)
To perform a Factory Reset on the RF324 Alarm
| |
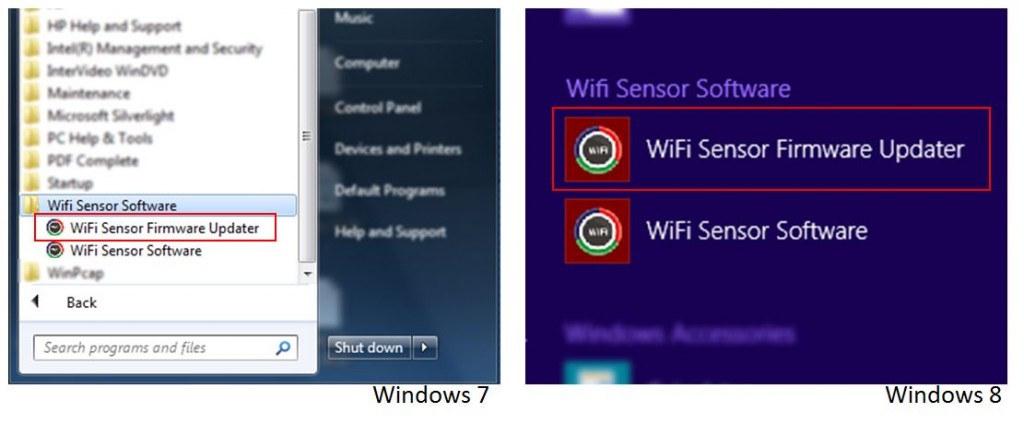
Help with updating the firmware of my RF300 Data LoggersHelp with updating the firmware of my RF300 Data LoggersThis knowledge base article refers to the RF300 Diligence Data Logger Firmware Updater. The software is compatible with Windows 7 & 8 and 8.1. How do I update the firmware in my RF300 Diligence Logger?The Firmware Updater is installed along with the WiFi Sensor Software. Find a link to it in your Start menu.
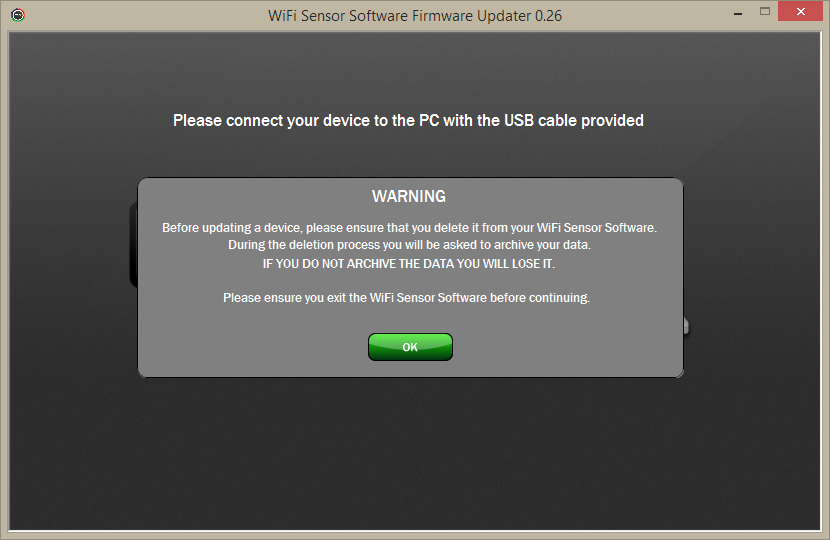
Start the WiFi Sensor Firmware Updater and follow the on-screen instructions. Carefully read the warning message to avoid losing valuable data!
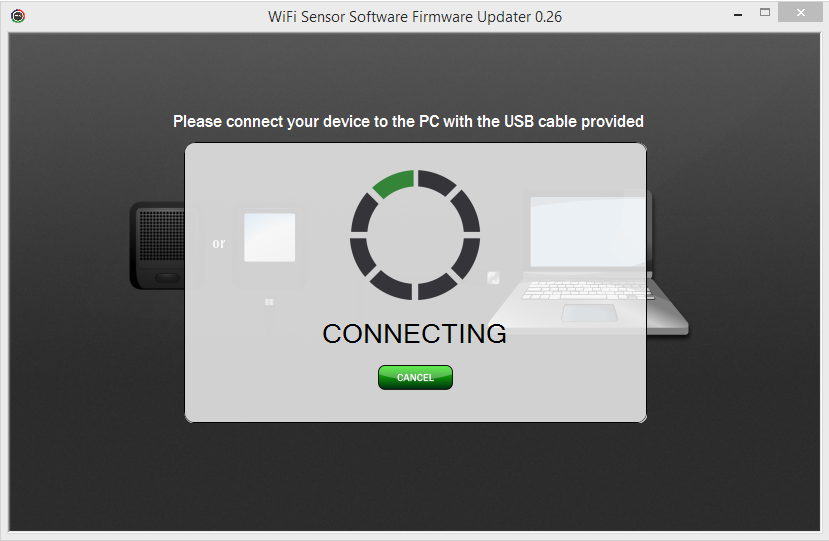
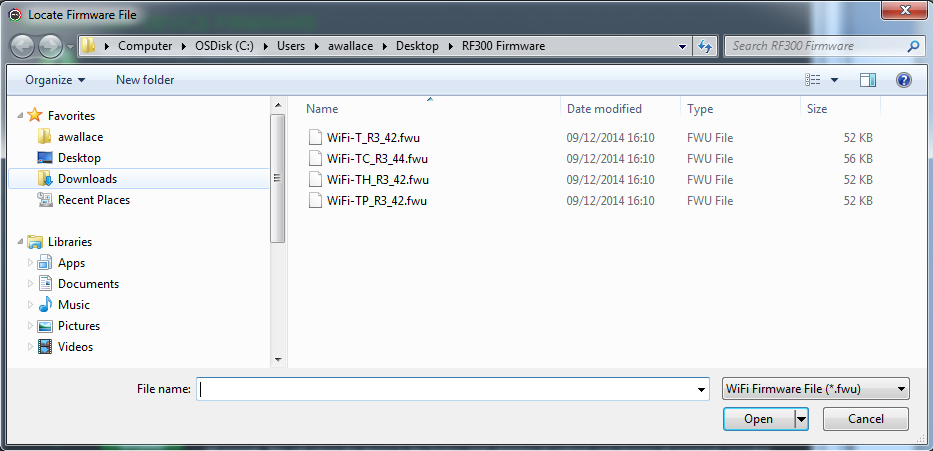
Connect the RF300 Logger you want to update using the USB cable supplied.
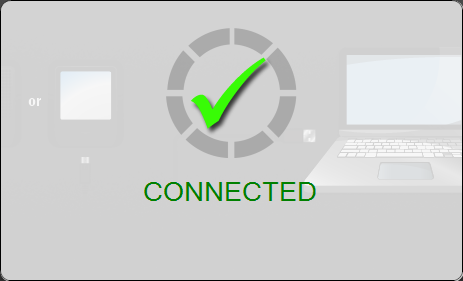
The Firmware Updater will automatically detect your Device and connect to it.
If your Device is not detected, do the following
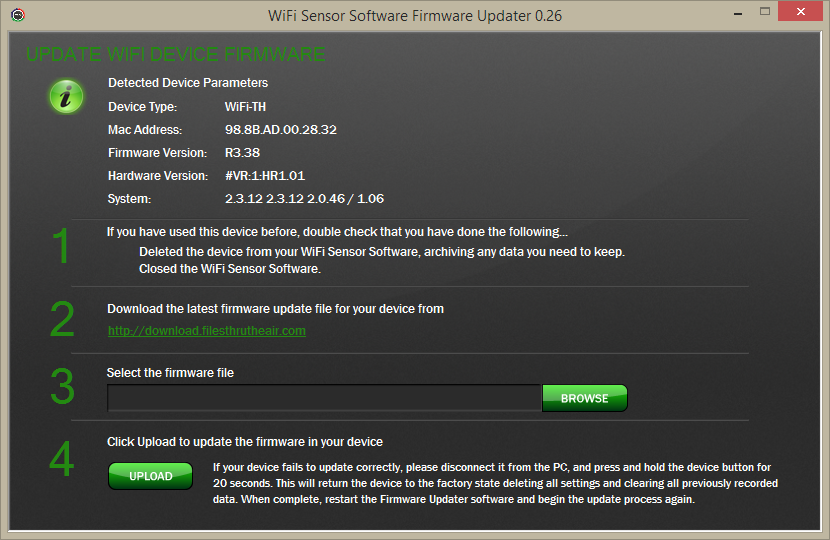
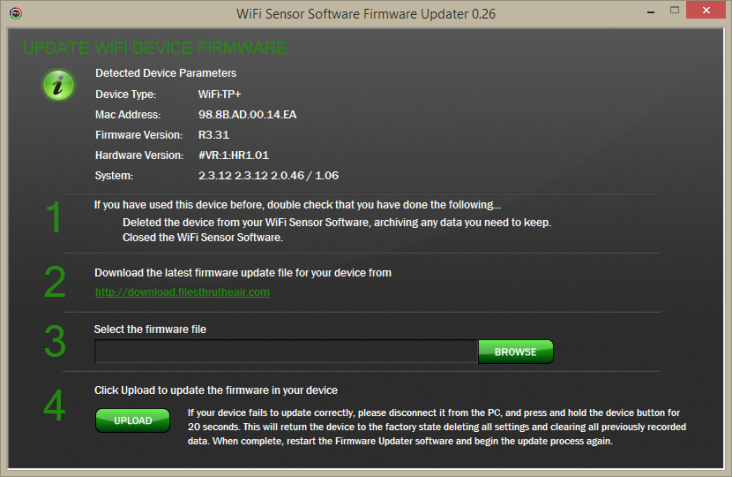
Update Firmware – This page shows details of the connected WiFi Device, MAC address, current Firmware version, hardware version and system summary. Follow the 4 simple steps to update your WiFi Device.
Updating the Firmware in your WiFi Device will cause it to be Factory Reset, disconnected from the WiFi network and cleared of all internal settings. Therefore, when you want to use your WiFi Device again, use the WiFi Sensor Software to connect it to a wireless network and set it up. If you have used the Device previously and data has been stored on the local PC, we recommend that you delete the Device from the WiFi Sensor Software and Archive any data you need to keep before proceeding. If you have used the Device previously and data has been stored on the Comark Cloud, continue with the Firmware Update; archiving of the existing Device will be done automatically.
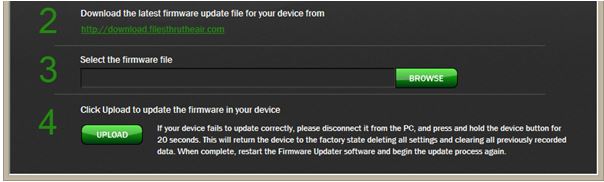
Click on UPLOAD to start updating the firmware
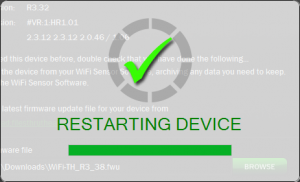
When Updating is complete the WiFi Device will restart
The Firmware Updater Software will check the update
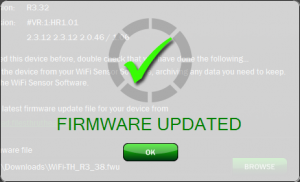
Your Firmware Update has been completed. Click OK to finish. When you want to use your WiFi Device again, use the WiFi Sensor Software to connect it to a wireless network and set it up.
| |
Help with Completely uninstalling the Diligence WiFi Sensor SoftwareHelp with Completely uninstalling the Diligence WiFi Sensor SoftwareThis knowledge base article refers to the Comark Diligence WiFi Software How do I completely remove the Diligence WiFi Software from my PC?
Locate the Diligence WiFi Software in the list and select Remove or Uninstall.
This might be Program Files (x86) \Comark\Diligence Wifi on some operating systems.
This might be Documents\Diligence WiFi on some operating systems, or ..\Diligence WiFi – Professional on some installations.
This might be Documents\config.wft on some operating systems.
The software and any related data is completely removed.
| |
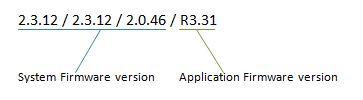
Help with finding the Firmware Version of your RF300 Data LoggerHelp with finding the Firmware Version of your RF300 Data LoggerThis knowledge base article will show you how to check the version of Firmware in your RF300 Diligence WiFi Data Logger. The firmware version comprises two parts, and is usually reported as shown:
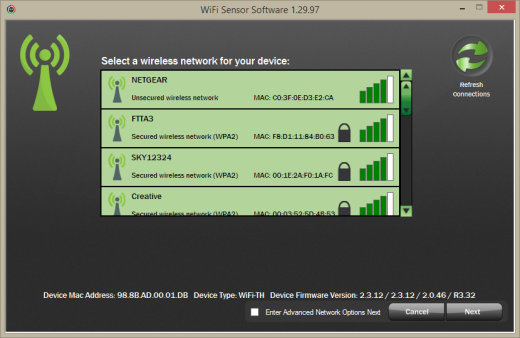
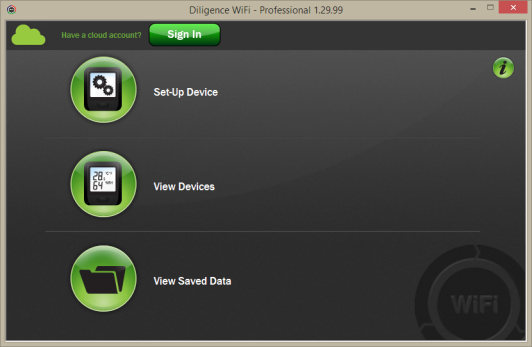
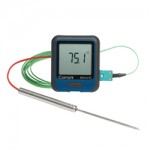
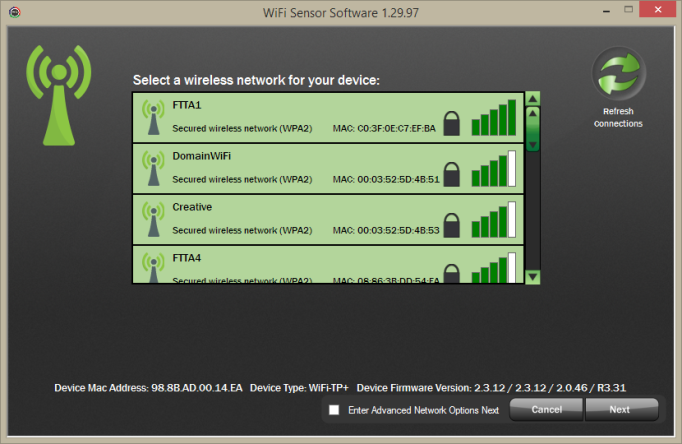
How do I find the firmware version installed in my RF300 Diligence WiFi Logger?PC SoftwareYou can check the firmware version when setting up your Sensor using the WiFi Sensor Software on your PC. The full firmware version is displayed on the Network Selection screen.
Firmware Updater SoftwareThe Application and System Firmware versions are displayed in the Device Parameters when the device is connected.
On the Comark Cloud
On the Device
| |
Help with McAfee All Access SoftwareHelp with McAfee All Access SoftwareThis knowledge base article refers to the McAfee All Access Software, although these instructions may also apply to other McAfee products. How do I allow the RF300 Diligence WiFi Sensor Software to communicate through my PC firewall?Open your McAfee application.
C:\Program Files (x86)\WiFi Sensor Software\ On some systems the folder may be .. C:\Program Files\WiFi Sensor Software\
How do I open the ports required by the RF300 Diligence WiFi Sensor Software?
| |
Help with Network Requirements and SettingsHelp with Network Requirements and SettingsThis knowledge base article offers guidance on Network Requirements and Settings for the RF300 Diligence WiFi sensor products. What Network Requirements are there to use the RF300 Diligence WiFi Sensor Products?The RF300 Diligence data logging sensors require an 802.11b compatible network and support the following encryption methods:
For Loggers sold before July 2016 The WiFi Sensors will only operate on an 802.11b network using data rates of 1,2,5.5,11 Mb/s. Wireless access points must be configured to allow 802.11b traffic (not g or n only modes). For Loggers sold from July 2016 onwards Comark has upgraded the Diligence WiFi Data Logger range from ‘b’ (IEEE 802.11b) to ‘bgn’ (IEEE 802.11b/g/n) WiFi compatibility.
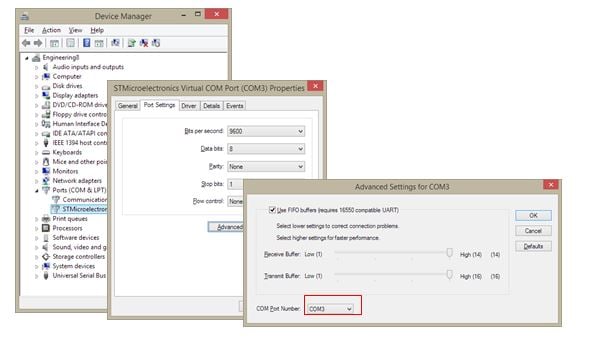
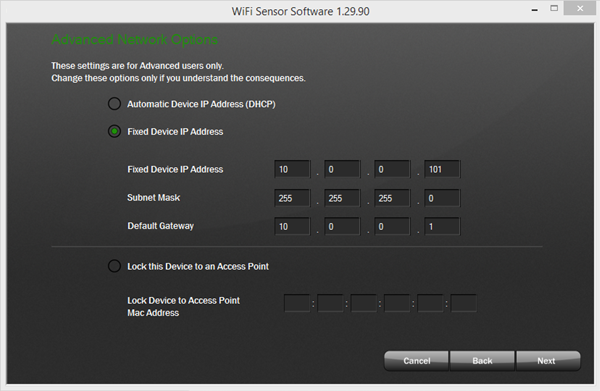
By default the WiFi Sensors will obtain an IP address via DHCP, this is normal for most networks. The IP address can also be manually configured – see below for more information. When using the PC software the sensors must be connected either wired or wirelessly to the same network and use the same IP address range as the PC. If the software is running on a virtual machine it may be given a different IP address to the host PC. It will need to be given an IP address that is in the same range as the WiFi Sensors. If you have multiple network connections on the PC, the software may not be able to automatically choose the one which the WiFi Sensors are connected to – see below for more information. When using the Comark Cloud service the sensors and the PC do not need to be on the same network but both require an internet connection during setup. Wireless access points must have wireless isolation or guest modes disabled to enable communication between devices. Corporate networks may need additional configuration to allow communication between the sensor and the PC. MAC Address filtering on the access point must be disabled or the address of the sensors included in the allowed list. The MAC Address can be found on the serial number label on the back of the unit. How do the RF300 Diligence WiFi Sensor Products communicate on the network and what firewall settings may be required?The WiFi Sensors communicate using different methods depending on whether they are connected to a local PC or to the Comark Cloud. All communication is initiated by the WiFi Sensors themselves. While not communicating, the devices are in a low power mode with the radio module turned off. Local PCThe Firewall must allow full access to the WiFi Sensor Software, failure to do so will prevent the sensors from communicating. From Application Firmware version 3.xx onwards, the WiFi sensors primarily use TCP port 10080 to communicate with the PC Software. In addition they use UDP broadcast packets on UDP ports 1024 and 8010 for alarm notifications and discovery of a PC once TCP connection has been lost. Any firewalls running on the PC will need the TCP and UDP ports open for correct operation. Cloud ServiceIn order to set up the WiFi Sensors on the Cloud, both the PC Software and the Sensors require an internet connection. The PC Software connects to the Cloud via a HTTPS connection in order to set up the sensor. This is only required during initial configuration. The WiFi Sensors communicate with the Cloud using TCP port 14354. Most domestic routers do not have restrictions on outbound TCP connections but corporate networks may require an exception in the router/firewall. UDP BroadcastCommunication between the WiFi Sensors and the RF324 WiFi Alarm unit is achieved using UDP broadcast as the sensors do not have knowledge of how many RF324’s are listening on the network. It is also used by the WiFi Sensors when running in local PC mode when TCP connection to the PC is lost. This is in order to recover from the situation where the IP address of the sensor may have changed. In order to reduce network traffic, many managed wireless networks have UDP broadcast traffic filtered by default which may inhibit the operation of the WiFi Devices. On Aruba managed networks this setting is called ‘Drop Broadcast and Multicast Traffic’. My PC has multiple network connections, is this a problem?When using the WiFi Sensors with the PC software, they must be on the same network in order to communicate. If the PC has multiple network connections e.g. wired and wireless, the WiFi Sensor Software may not be able to automatically select the correct network connection.
On the Wireless Network selection screen, click on the green antenna symbol on the top left of the window. This will cause a drop-down box to appear on the bottom left. Select the network adapter which corresponds to the same network as the WiFi Sensors. Then continue the setup as normal. How do I configure my WiFi Sensors with a static IP Address?If you do not have a DHCP server on your network or wish to manually assign an IP address, these settings are found on the Advanced Network Options screen.
Ticking the box on the Wireless Network Selection screen then clicking ‘Next’ will take you to the advanced options.
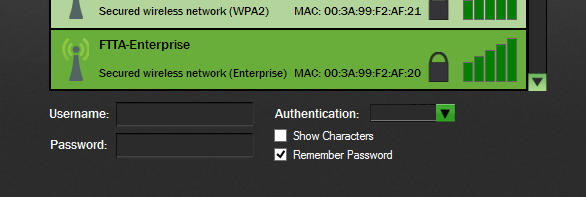
Can I connect my WiFi Sensors to a wireless network with Enterprise Authentication?Enterprise Authentication is supported on devices with System Firmware of 2.3.12 and above. We support the following Authentication Methods:
Selecting an Enterprise network will prompt entry of a username and password:
You also need to select the authentication type in the dropdown box. Consult your IT Administrator if you are unsure what type of enterprise network you have. We do not support the following types which require a client certificate to be installed:
My Wireless Network doesn’t appear in the list, what could be causing this?If you have refreshed the network list several times but your network does not appear, there are several possible causes: The wireless network could be out of range of the sensor, try moving the sensor and the access point/router closer together and trying again. The wireless network name (SSID) could be hidden. Either change the access point or router configuration to make the SSID visible or use the option to connect to Join Other Network and enter the details manually.
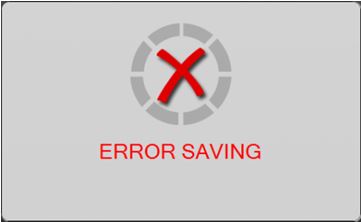
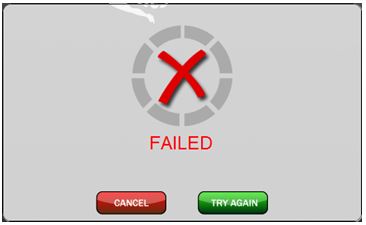
The SSID may contain invalid characters. The wifi sensors are unable to handle certain special characters such as spaces or commas in the SSID or trailing spaces at the end. You may need to change the SSID of the network. This also applies to passwords. The wireless network may not have the correct modulation or data rates enabled. The WiFi sensors require 802.11b to be enabled. I am getting an ‘Error Saving’ message at the end of the set-up process for my WiFi Sensor, what could be causing this?At the end of the set-up process, the WiFi Sensors transmit a test message to the PC Software or to the Cloud in order to confirm that the configuration is correct. This error message most often due to the test connection failing.
Local PCThe most common reason for the test connection to fail is the packets being blocked by a firewall on your PC. Please follow our firewall configuration guides to ensure that you have the required ports open. In order to communicate, the PC must be on the same network as the wireless device which the sensors are connected to. Another cause of the test connection failing can be if you have multiple network adapters on your PC, such as a wired and wireless connection or a USB 3G Modem connected. Please see the help section on multiple network adapters.
Cloud ServiceWhen connecting a sensor to the Cloud, the message is transmitted across the internet to the Cloud Server. This requires the sensor to be able to access the internet via the wireless network on TCP Port 14354. Most domestic internet routers do not have restrictions on outbound TCP connections by default. Users on corporate networks may need to contact their IT Administrator to ensure that TCP Port 14354 is open for outbound traffic.
I have multiple access points with the same name (SSID), could this cause problems with the WiFi Sensors?Devices with System Firmware of 2.3.12 or above are capable of selecting the strongest access point with the SSID it is configured to use. If you are moving a sensor between the coverage of two access points, it may lose connection temporarily with the PC software or the Cloud while it finds the new access point. Devices with previous versions of the System Firmware will chose the Access Point with the lowest channel number. If you have multiple Access Points with the same SSID and are experiencing issues with a device showing a low signal strength despite being close to an access point it may be trying to connect to one further away. In order to work around this issue it is possible to lock a WiFi Sensor to the MAC Address of an Access Point. This option is found on the Advance Network Configuration screen.
Ticking the box on the Wireless Network Selection screen then clicking ‘Next’ will take you to the advanced options.
Enter the MAC Address of the access point you want to lock the sensor to. There is an Enterprise Level Firewall (eg Sonicwall, Fortigate) on our network, will this stop the WiFi Sensors working on the Cloud?The answer to this depends very much on the configuration of the Firewall. If the Firewall is configured to allow unrestricted outbound traffic, it should not cause any issues. Some corporate firewalls are configured to only allow traffic from known or authenticated clients, eg using Windows Domain Login. As the WiFi Sensors are unable to respond to requests to identify themselves, the Firewall may not allow access through to the internet. In this case, an exception will need to be added for the IP or MAC Address of the WiFi Sensor. Please consult your IT Administrator.
| 26th March 2015 |
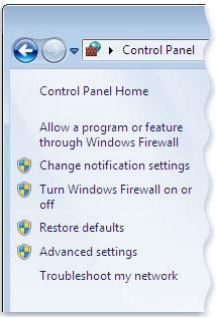
Help with Windows FirewallHelp with Windows FirewallThis knowledge base article refers to the Windows Firewall and covers Windows 7 and 8. How do I allow the RF300 Diligence WiFi Sensor Software to communicate through my PC firewall?Open your Windows Firewall
How do I open the ports required by the RF300 Diligence WiFi Sensor Software?Open your Windows Firewall
Follow the same rules for UDP ports 1024 and 8010
| |
Help with Symantec FirewallHelp with Symantec FirewallThis knowledge base article refers to Symantec Norton Internet Security, although these instructions may also apply to other Symantec products. How do I allow the RF300 Diligence WiFi Sensor Software to communicate through my PC firewall?Open up Norton Internet Security
Click Apply. How do I open the ports required by the RF300 Diligence WiFi Sensor Software?Open Norton Internet Security. Choose the Settings menu option on the control panel and click Configure in the Smart Firewall menu tab.
| |
Help with ZoneAlarm FirewallHelp with ZoneAlarm FirewallThis knowledge base article refers to ZoneAlarm Pro Antivirus and Firewall How do I allow the RF300 Diligence WiFi Sensor Software to communicate through my PC firewall?Open ZoneAlarm Pro Antivirus and Firewall
How do I open the ports required by the RF300 Diligence WiFi Sensor Software?Open ZoneAlarm Pro Antivirus and Firewall
Click Apply, then click OK
| |
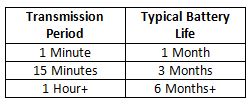
Battery Life ExpectationBattery Life ExpectationThis article offers guidance on battery life for the RF300 Diligence WiFi sensor products How long will a fully charged battery last in my RF300 Diligence WiFi sensor?The RF300 Diligence WiFi data logging sensors are powered by quality LiPo batteries. The battery life of the sensor is dependent on use. Transmitting data uses a lot of battery power. By increasing the time between transmissions the battery will last longer. See the table below.
The product will arrive partly charged but you should charge it for 24 hours before use for optimum performance. The battery can be recharged using a PC, a USB wall adapter, or a portable USB battery pack using the USB lead provided. It can also be permanently powered by a USB wall adapter or USB battery pack. Readings may be affected for some sensor types, while the internal battery is being charged. However once charged, continued connection of the charger will have no effect. Battery life is dependent on a wide range of parameters including:
Regardless of whether you have chosen to store your data on the PC or on the Comark Cloud, optimum battery life is achieved when each data transmission from the WiFi sensor is successfully received by the host. If the PC Software is not running, the WiFi network is down, or for any other reason connection between sensor and host is lost, the sensor attempts to periodically re-establish communications until connection is made and data is synced. To ensure optimal battery life we recommend that wherever possible, a wireless connection to the host is permanently maintained.
What is the service life of the battery inside my RF300 Diligence WiFi Sensor?It is generally accepted, that the service life of a battery has come to an end when it reaches 80% of its original capacity (of course the battery will continue to work satisfactorily beyond this). Our products use a quality LiPo (Lithium Polymer) battery which, under normal conditions of operation, charging and storage, will provide a service life in excess of 300 charge/discharge cycles. For example, if you recharge your sensor every three months, the battery service life would be at least 75 years. How should I store my RF300 Diligence WiFi Sensors?If you need to store your WiFi sensors for any length of time, we recommend the following guidelines in order to preserve battery capacity..
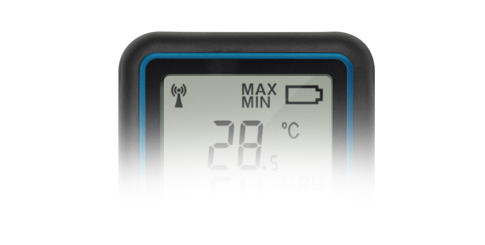
Why is the battery in my RF300 Diligence WiFi Sensor not charging?It is safe to recharge the WiFi sensor between 0 and 40°C. A safety feature inside, prevents charging when the internal temperature is outside this range. This ‘charging error’ condition is indicated when both MIN and MAX are shown together on the LCD.
How do I ensure that I get the best possible battery life from my RF300 Diligence WiFi Sensors?
| 24th March 2015 |


Related products
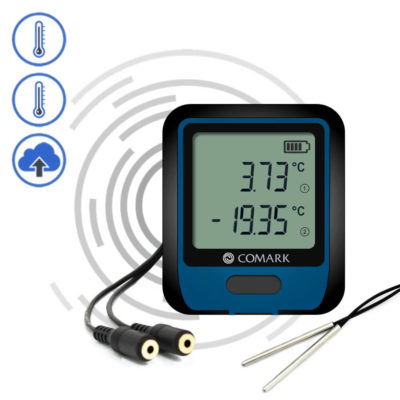
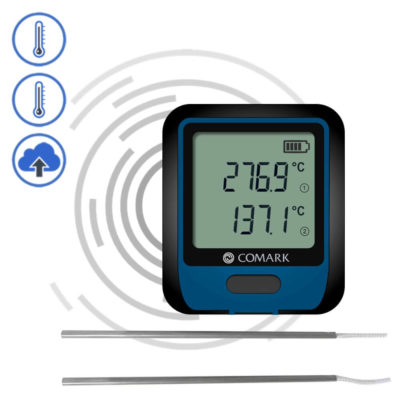
- RF312DualPlus

WiFi Dual Channel Data Logger with Thermistor Probes
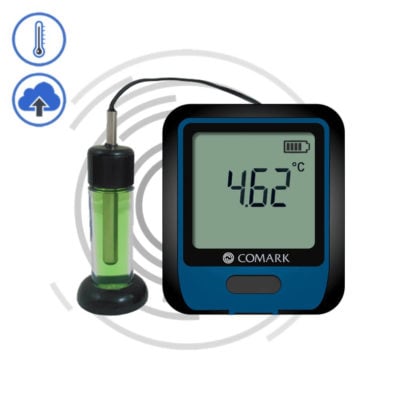
- RF312Glycol
%27%20fill-opacity%3D%27.5%27%3E%3Cellipse%20fill%3D%22%233a3a3a%22%20fill-opacity%3D%22.5%22%20rx%3D%221%22%20ry%3D%221%22%20transform%3D%22rotate(-59.8%20293%20-95.8)%20scale(114.54275%20118.62303)%22%2F%3E%3Cellipse%20fill%3D%22%23fff%22%20fill-opacity%3D%22.5%22%20rx%3D%221%22%20ry%3D%221%22%20transform%3D%22rotate(-177.8%2082.8%20183.8)%20scale(376.06732%2050.31009)%22%2F%3E%3Cellipse%20fill%3D%22%23fff%22%20fill-opacity%3D%22.5%22%20rx%3D%221%22%20ry%3D%221%22%20transform%3D%22rotate(-89.6%20130%20-94)%20scale(45.23216%20398.43752)%22%2F%3E%3Cpath%20fill%3D%22%23fff%22%20fill-opacity%3D%22.5%22%20d%3D%22M81.4%20408.5l-112.3%206-17.7-337.1%20112.3-5.9z%22%2F%3E%3C%2Fg%3E%3C%2Fsvg%3E)
Glycol Simulant WiFi Data Logger
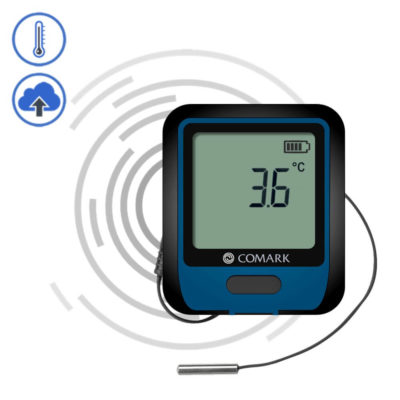
- RF311-T
%22%20transform%3D%22translate(.8%20.8)%20scale(1.5625)%22%20fill-opacity%3D%22.5%22%3E%3Cellipse%20fill%3D%22%23343434%22%20rx%3D%221%22%20ry%3D%221%22%20transform%3D%22rotate(93.7%2017.5%20137.4)%20scale(75.64916%2064.53272)%22%2F%3E%3Cellipse%20fill%3D%22%23fff%22%20cx%3D%2240%22%20cy%3D%22114%22%20rx%3D%2248%22%20ry%3D%22255%22%2F%3E%3Cellipse%20fill%3D%22%23fff%22%20cx%3D%22155%22%20cy%3D%22238%22%20rx%3D%22255%22%20ry%3D%2229%22%2F%3E%3Cellipse%20fill%3D%22%23fff%22%20rx%3D%221%22%20ry%3D%221%22%20transform%3D%22matrix(-251.77015%20-40.45728%204.76241%20-29.637%20240%2028.7)%22%2F%3E%3C%2Fg%3E%3C%2Fsvg%3E)
WiFi Temperature Data Logger
- RF314Dual
%22%20transform%3D%22translate(.8%20.8)%20scale(1.5625)%22%20fill-opacity%3D%22.5%22%3E%3Cellipse%20fill%3D%22%23333%22%20rx%3D%221%22%20ry%3D%221%22%20transform%3D%22matrix(-.73025%20-75.4504%2065.68243%20-.63571%20156%20132.5)%22%2F%3E%3Cellipse%20fill%3D%22%23fff%22%20rx%3D%221%22%20ry%3D%221%22%20transform%3D%22matrix(49.4217%206.94577%20-35.48914%20252.51834%2044%2067.7)%22%2F%3E%3Cellipse%20fill%3D%22%23fff%22%20rx%3D%221%22%20ry%3D%221%22%20transform%3D%22rotate(9.6%20-10.6%201074.8)%20scale(255%2032.69391)%22%2F%3E%3Cellipse%20fill%3D%22%23fff%22%20cx%3D%22141%22%20cy%3D%22237%22%20rx%3D%22255%22%20ry%3D%2222%22%2F%3E%3C%2Fg%3E%3C%2Fsvg%3E)
WiFi Dual Channel Data Logger with Thermocouples
- RF314-TC
%22%20transform%3D%22translate(.5%20.5)%22%20fill-opacity%3D%22.5%22%3E%3Cellipse%20rx%3D%221%22%20ry%3D%221%22%20transform%3D%22matrix(90.43982%20-7.18756%202.3624%2029.72554%20130%200)%22%2F%3E%3Cellipse%20fill%3D%22%23fff%22%20rx%3D%221%22%20ry%3D%221%22%20transform%3D%22matrix(134.8808%2025.25868%20-5.17868%2027.65402%20120.6%2063.8)%22%2F%3E%3Cellipse%20cx%3D%22115%22%20cy%3D%226%22%20rx%3D%2271%22%20ry%3D%2217%22%2F%3E%3Cellipse%20rx%3D%221%22%20ry%3D%221%22%20transform%3D%22matrix(17.0247%20-14.4972%2011.4116%2013.40113%203.7%2079)%22%2F%3E%3C%2Fg%3E%3C%2Fsvg%3E)
WiFi Temperature Data Logger with Thermocouple Probe
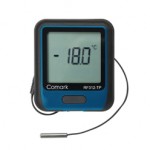
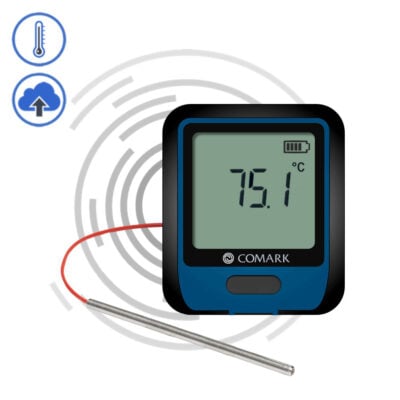
- RF312-TP
%22%20transform%3D%22translate(.8%20.8)%20scale(1.5625)%22%20fill-opacity%3D%22.5%22%3E%3Cellipse%20fill%3D%22%23363636%22%20rx%3D%221%22%20ry%3D%221%22%20transform%3D%22matrix(66.3749%2011.93978%20-13.37037%2074.32778%20156.9%20130.3)%22%2F%3E%3Cellipse%20fill%3D%22%23fff%22%20rx%3D%221%22%20ry%3D%221%22%20transform%3D%22rotate(-177.8%2022%2066.5)%20scale(50.59516%20255.00001)%22%2F%3E%3Cellipse%20fill%3D%22%23fff%22%20rx%3D%221%22%20ry%3D%221%22%20transform%3D%22matrix(-4.72527%2029.82394%20-246.00803%20-38.97723%20228.6%2026.7)%22%2F%3E%3Cellipse%20fill%3D%22%23fff%22%20cx%3D%22160%22%20cy%3D%22239%22%20rx%3D%22255%22%20ry%3D%2225%22%2F%3E%3C%2Fg%3E%3C%2Fsvg%3E)
WiFi Temperature Data Logger with Thermistor Probe
- RF306
%22%20transform%3D%22translate(.8%20.8)%20scale(1.5625)%22%20fill-opacity%3D%22.5%22%3E%3Cpath%20fill%3D%22%23d6d6d6%22%20d%3D%22M124%2023l119%20248H5z%22%2F%3E%3Cellipse%20fill%3D%22%23fff%22%20cx%3D%22122%22%20cy%3D%22239%22%20rx%3D%2227%22%20ry%3D%2238%22%2F%3E%3Cellipse%20fill%3D%22%23fff%22%20rx%3D%221%22%20ry%3D%221%22%20transform%3D%22rotate(73.2%2057.7%20192)%20scale(154.49636%2065.02963)%22%2F%3E%3Cellipse%20fill%3D%22%23fff%22%20rx%3D%221%22%20ry%3D%221%22%20transform%3D%22rotate(13.2%20-312.9%20172.9)%20scale(57.22655%20148.66204)%22%2F%3E%3C%2Fg%3E%3C%2Fsvg%3E)
Wall Bracket
- RF320-USA
%27%20fill-opacity%3D%27.5%27%3E%3Cellipse%20fill%3D%22%23525252%22%20fill-opacity%3D%22.5%22%20rx%3D%221%22%20ry%3D%221%22%20transform%3D%22matrix(63.8932%20-92.66385%2069.30126%2047.78432%20255%20177.2)%22%2F%3E%3Cellipse%20fill%3D%22%23fff%22%20fill-opacity%3D%22.5%22%20rx%3D%221%22%20ry%3D%221%22%20transform%3D%22rotate(43.6%20-40.8%20131.9)%20scale(103.54636%20398.43749)%22%2F%3E%3Cellipse%20fill%3D%22%23fff%22%20fill-opacity%3D%22.5%22%20rx%3D%221%22%20ry%3D%221%22%20transform%3D%22matrix(395.46402%20-48.5865%208.92384%2072.63458%20203.3%20382.2)%22%2F%3E%3Cellipse%20fill%3D%22%23555%22%20fill-opacity%3D%22.5%22%20rx%3D%221%22%20ry%3D%221%22%20transform%3D%22matrix(59.83229%2011.08926%20-9.09028%2049.04674%20267.6%20155)%22%2F%3E%3C%2Fg%3E%3C%2Fsvg%3E)
Power Supply Unit