RF515 and Adapter Kit
Part No: RF515KIT (4019559)The RF515KIT provides you with an RF515 Multi-Parameter Wireless Transmitter as well as an RF515A Adapter Box.
- LCD Screen for Local Display
- Current Measurement Range: 4-20mA
- Voltage Measurement Range: 0-1V / 0-10V
- Warranty: See individual components
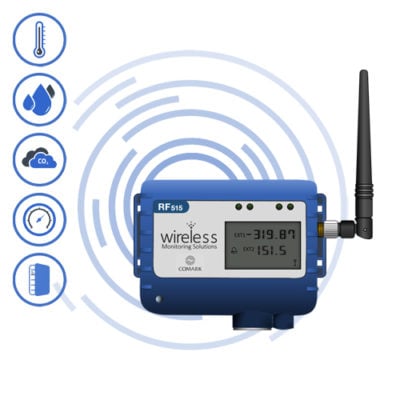
RF515 and Adapter Kit
The RF515KIT provides you with an RF515 Multi-Parameter Wireless Transmitter as well as an RF515A Adapter Box.
The RF515 Multi-Parameter Wireless Transmitter can be used in wide ranging applications to automate monitoring of parameters such as pressure, gas, flow, level, dissolved oxygen, CO2 and many more.
The RF515A Adapter, a two-channel terminal box fitted with a 0.25m lead and terminated with a 6-Pin Lumberg Plug, allows you to connect third party devices to the analog input channels that the RF515 Transmitter can accept.
BioCote Antimicrobial Protection to inhibit growth of bacteria, mould and fungi providing an extra line of defence in high-risk environments.
Technical Specifications
| Name | Value |
|---|---|
| Transmitter Specifications | See the RF515 Multi-Parameter Wireless Transmitter > Technical Specifications |
| Adapter Specifications | See the RF515A Adapter Box > Technical Specifications |
| Warranty | Please refer to individual components |
*You will need to Sign In to view additional content
Documentation
Downloads
| Name | Version | Size | Date | |
|---|---|---|---|---|
| RF515 Transmitter Firmware | 3.0.0 | 28.09 KB | 4th December 2014 |
Articles / FAQs
| Name | Date | ||||||||||
|---|---|---|---|---|---|---|---|---|---|---|---|
Returned Transmitters not logging (Unknown Task/Period)Returned Transmitters not logging (Unknown Task/Period)On occasion we have seen that RF500 System Transmitters that have been returned to a Customer after having been calibrated off-site, are not logging as expected and are showing an unknown task or period. To resolve this issue you will simply need to re-task the Transmitter in question, to your specification. Unfortunately, if your Transmitter hasn’t sent any data since going into the error state, then that data will be lost when the unit is re-tasked. To re-task a Transmitter, simply log on to the Gateway, locate the relevant Transmitter on the Homepage and click on the Summary Graph. Once on the ‘Summary’ page, click the ‘Task’ icon. You should double-check the settings for the task, before clicking on ‘Program Task’ (or ‘Program’). Please allow up to half an hour for the Task to be successfully sent to the Transmitter, assuming a 15 minute radio rate. If required, you can speed the process up by ‘provoking’ the Transmitter using an RF525 Transmitter Activator.
| 24th March 2015 | ||||||||||
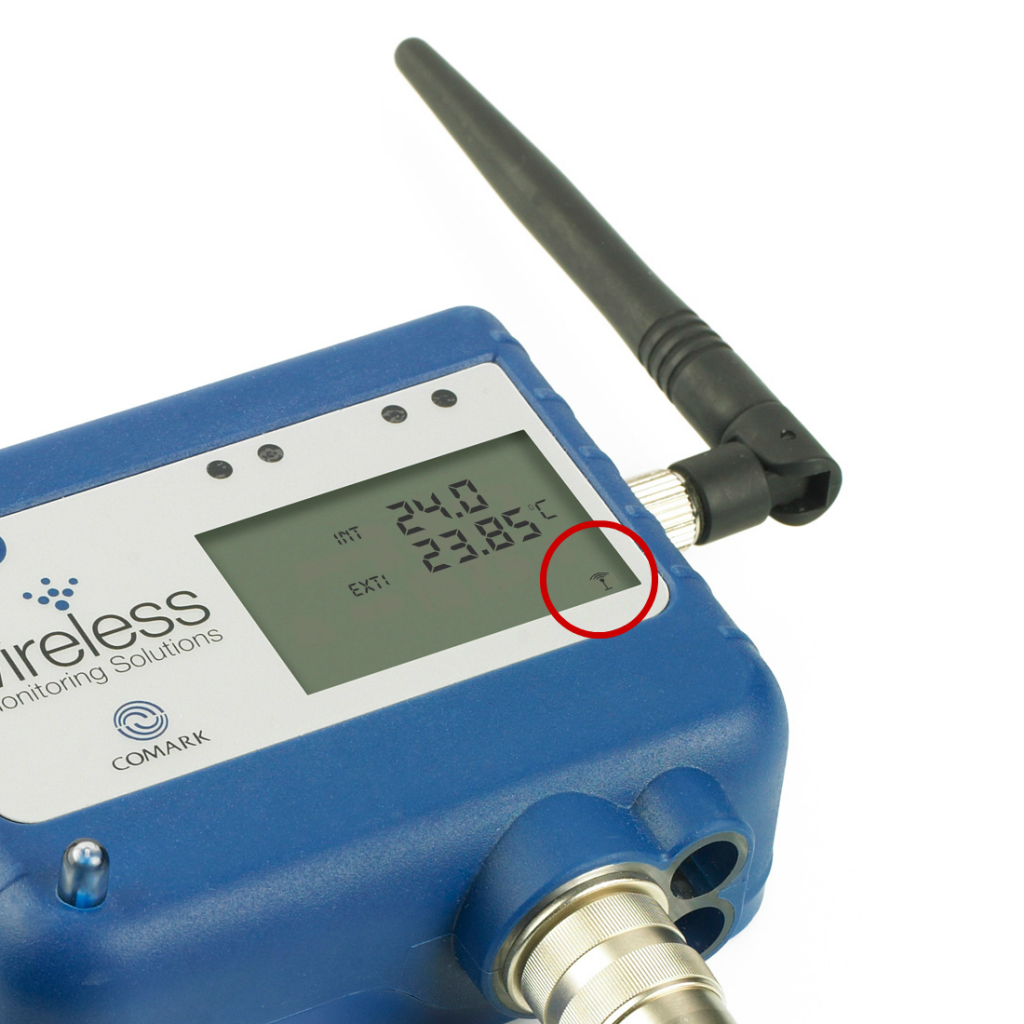
Why does my Transmitter flash the antenna symbol three times when Activator used?Why does my Transmitter flash the antenna symbol three times when Activator used?On occasion you may find that one of your RF51x Transmitters will not communicate with your RF500 System Gateway device and when you attempt to ‘provoke’ the Transmitter using the RF525 Transmitter Activator, the small ‘antenna’ symbol (shown below) just flashes three times.
This will potentially happen if the Transmitter in question believes that it is a Meshing (or Backbone) Unit. In which case, it will not communicate with the Gateway unless it is connected to an external Power Supply Unit (RF520).
Ensure that the RF520 Power Supply Unit is connected to the Transmitter and powered on, then try to ‘provoke’ the Transmitter once more, using the RF525 Transmitter Activator. If the Transmitter is not meant to be a Meshing or Backbone Unit then ensure that it is not set to be a ‘Backbone’ Unit on the Gateway. Confirm that this change has gone through on the Gateway before removing power from the Transmitter and re-installing. | 18th March 2015 | ||||||||||
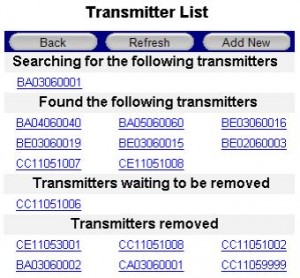
How do I add a new Transmitter to my Gateway?How do I add a new Transmitter to my Gateway?To add a new Transmitter to your existing RF500 Gateway device, simply follow the instructions below, or refer to the ‘Transmitter Management’ section of the in the RF500 Webview Help Guide (Pages 46-47). Transmitter settings are usually only able to be accessed by a System ‘Administrator’, although the permissions required to add a new Transmitter, can be granted to a ‘Restricted User’. To add a new Transmitter you should navigate to the Gateway Home Page, click the ‘Administration’ button, followed by the ‘Transmitters’ button. A categorised list of Transmitter Serial Numbers will then be displayed (as below), along with the option to ‘Add New’.
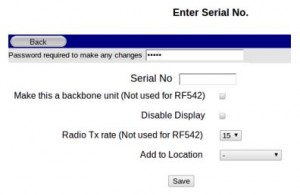
Click on the ‘Add New’ button (as shown above) after which you should get a form, similar to that shown below;
You will need to enter the following information to add a new Transmitter:
Once you have entered that information and decide on the other options you require, simply click on the ‘Save’ button. Your newly added Transmitter should now appear in the section entitled ‘Searching for the following Transmitters’.
| 19th November 2014 | ||||||||||
Transmitters show ‘No signal’Transmitters show ‘No signal’On occasion you may appear to suffer ‘signal loss’ between your Gateway device and your Transmitters. Initially, you should confirm that there are no ‘Low Battery’ warnings showing for your Transmitters on your Gateway Device. Transmitters show ‘No signal’ when they have been continuously out of contact with the Gateway for a duration of 5 times the radio rate or a minimum of 1 hour. For the standard radio rate of 15 minutes, this amounts to approximately 1 hour 15 minutes before a ‘No signal’ is flagged. In that time, the Gateway has determined that it has not received a valid signal/data packet from the Transmitter. The table below details some basic troubleshooting, should you encounter this issue:
| 18th November 2014 | ||||||||||
Batteries only last a few monthsBatteries only last a few monthsBattery life quoted for RF5xx Transmitters makes a number of assumptions about the operating use and conditions. Transmitters are assumed only to transmit one data record to your RF500A/AP Gateway every 15 minutes. Operation of the Transmitter is assumed to be at ambient, approx. 23°C. Deviations from this specification will have an effect on the battery life of each Transmitter. For example:
| |||||||||||
Low battery indication does not clearLow battery indication does not clearThe ‘Low Battery’ message on the homepage of the Gateway might not clear immediately after you have changed the battery of one of your transmitters.
When a Transmitter battery is replaced, it generates a ‘Battery Good’ event record and queues it for transmission to the Gateway. The ‘Low Battery’ message on the Homepage of the Gateway is cleared when the Gateway receives this ‘Battery Good’ record from the Transmitter. This event record is also posted to the Audit Trail as pictured below.
The Transmitter data queue could be several thousand records long and may take several hours before the ‘Battery Good’ record is sent. You can check this progress by looking for the last data on the homepage of the Transmitter. When the data is up-to-date then the ‘Low Battery’ warning should also clear. The best way to avoid this delay is to change the battery soon after the first ‘Low Battery’ warning message is posted on the Gateway homepage. The longer the Transmitter is left in the low battery condition the longer the data record queue becomes. Beware of re-tasking the Transmitter, because the data record queue is cleared as a result. The ‘Battery Good’ record will also be cleared and the Gateway ‘Low Battery’ message will not clear even through the Transmitter appears to be working normally. Should this happen, then simply remove and refit the battery of the Transmitter in question, so that the Transmitter believes that a new battery has been fitted.
| |||||||||||
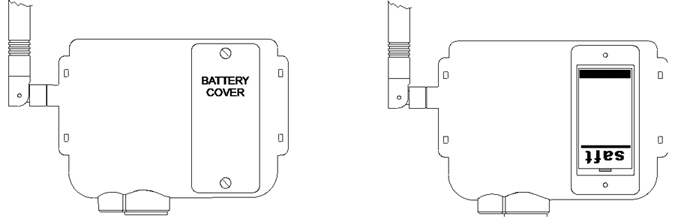
How do I change the battery in my Transmitter?How do I change the battery in my Transmitter?The following information describes how to change the battery of your RF51x Transmitter. Battery Change ProcedureThe Transmitter latches any low battery condition and must be powered off fully for it to clear. You will need to wait for the display to go completely blank, in order to ensure that the low battery status has cleared. To replace the battery:
Manufacturer part number: Saft LSH14 LIGHT or Saft LS26500The Saft LS26500 battery can only be used in Transmitters manufactured after April 2009. The date-of-manufacture is encoded in the serial number of each unit. The serial number has the format MMYYxxxx where MM represents the 2-digit month and YY represents the 2-digit year in which the transmitter was manufactured. Only use Saft LSH14 LIGHT (Comark Instruments part number # RFBATT) or Saft LS26500 as replacement battery cells. | |||||||||||
RF5xx Transmitter Status Codes (COdE) ExplainedRF5xx Transmitter Status Codes (COdE) ExplainedUnder certain conditions your RF5xx Transmitter might display a Status Code on the LCD screen which takes the form of the word ‘COdE’ followed by either a 3- or 4-digit alphanumeric sequence. These Status Codes can help in diagnosing the reason why a Transmitter might be failing to transmit data to the Gateway.
The ‘COdE’ based message is only seen on RF5xx Transmitters with Firmware Version 3.0.0 or higher. It is worth noting that Status Codes generally indicate a problem, that can be resolved by the user. For detailed information on the Status Code that your RF5xx Transmitter is displaying, please select the appropriate code from those listed below:
| 6th November 2014 | ||||||||||
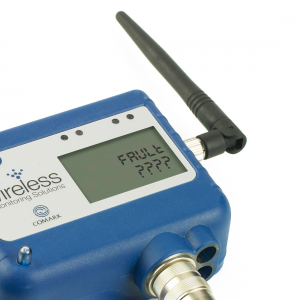
RF5xx Transmitter Fault Messages (FAULt) ExplainedRF5xx Transmitter Fault Messages (FAULt) ExplainedUnder certain conditions your RF51x Transmitter might display a Fault Message on the LCD screen which takes the form of the word ‘FAULt’ followed by either a 3- or 4-digit alphanumeric sequence. These Fault Messages are alerting you to a failure of some kind within the device.
A ‘FAULt’ based message is only seen on RF5xx Transmitters with Firmware Version 3.0.0 or higher. It is worth noting that Fault Messages generally cannot be resolved by the user. For detailed information on the particular Fault Message that your RF5xx Transmitter is displaying, please select the appropriate variant from those listed below:
This article refers to a Fault message seen on Transmitters with Firmware Version 3.0.0 or higher. The following full fault messages are covered by this article: 001,101,201,301,401,501,601,701,801,901,A01,B01,C01,D01,E01,F01,1001,1101,1201,1301,1401,1501,1601,1701,1801,1901,1A01, 1B01,1C01,1D01,1E01,1F01,002,102,202,302,402,502,602,702,802,902,A02,B02,C02,D02,E02,F02,1002,1102,1202,1302,1402,1502,1602,1702,1802,1902,1A02, 1B02,1C02,1D02,1E02,1F02,004,104,204,304,404,504,604,704,804,904,A04,B04,C04,D04,E04,F04,1004,1104,1204,1304,1404,1504,1604,1704,1804,1904,1A04, 1B04,1C04,1D04,1E04,1F04,008,108,208,308,408,508,608,708,808,908,A08,B08,C08,D08,E08,F08,1008,1108,1208,1308,1408,1508,1608,1708,1808,1908,1A08, 1B08,1C08,1D08,1E08,1F08
| |||||||||||
RF5xx Transmitter Error Messages (ErrOr) ExplainedRF5xx Transmitter Error Messages (ErrOr) ExplainedUnder certain conditions your RF5xx Transmitter might display an Error Message on the LCD screen which takes the form of the word ‘ErrOr’ followed by either a 3- or 4-digit alphanumeric sequence. These Error Messages can help in diagnosing the reason why a Transmitter might be failing to transmit data to the Gateway.
The ‘ErrOr’ based message is only seen on RF5xx Transmitters with a Firmware Version 2.4.2 or lower. It is worth noting that these Error Messages generally indicate a problem, that can be resolved by the user. For detailed information on the Error Message that your RF5xx Transmitter is displaying, please select the appropriate code from those listed below:
| 27th January 2015 |